By Chatterbate Editorial · 12 min read · Published 4/23/2026
Crystal-Clear Cams: The Ultimate Chatterbate Streaming-Setup Guide (2025) for Beginners and Pros
Key Takeaways
- Your three essentials: a 1080p webcam, a dedicated ring light, and a wired connection with at least 10Mbps upload speed.
- Poor audio drives viewers away faster than almost anything else, don't ignore it.
- Sort your lighting and internet connection before spending money on camera upgrades.
- The Logitech C920 is the standard budget webcam recommendation; the Brio 4K is worth considering once you're earning consistently.
- Even a Blue Snowball iCE will make a noticeable difference compared to a built-in laptop mic.
💡 Key Takeaways
- Your three essentials: a 1080p webcam, a dedicated ring light, and a wired connection with at least 10Mbps upload speed.
- Poor audio drives viewers away faster than almost anything else, don't ignore it.
- Sort your lighting and internet connection before spending money on camera upgrades.
- The Logitech C920 is the standard budget webcam recommendation; the Brio 4K is worth considering once you're earning consistently.
- Even a Blue Snowball iCE will make a noticeable difference compared to a built-in laptop mic.
- Most new streamers focus heavily on video quality and overlook audio entirely. That's worth avoiding.
📋 Table of Contents
- What Actually Drives Chaturbate Earnings
- Why Stream Quality Affects Tips
- Chatterbate Streaming Equipment List: Budget and Mid-Range Options
- Your Step-by-Step Studio Build
- How to Talk About Your Setup On-Stream
- Beginner Budget vs Advanced Investment: Scaling Sensibly
- Common Mistakes That Cost You Viewers and Tokens
- Your Immediate Action Plan
What Actually Drives Chaturbate Earnings
Most new streamers assume that a better camera means better earnings. In practice, it rarely works that way. A viewer who can barely hear you will leave within a few minutes, even if your picture is sharp.
Some Chaturbate streamers pull consistent tips with fairly modest setups, while others with more expensive gear struggle to hold an audience. The difference usually comes down to a handful of basics that are easy to overlook when you're just starting out.
This Chatterbate streaming equipment list covers what actually matters and in what order to tackle it. An expensive setup isn't required to do well. A laggy connection or poor lighting will typically cost you more income than a budget camera ever would.
Get these three things right first: a 1080p webcam, a dedicated ring light, and a stable upload speed of at least 10Mbps. Everything else can wait until you're earning regularly.
Why Stream Quality Affects Tips
When viewers can clearly see your expressions and hear your voice without distortion, it's easier for them to feel engaged. Good equipment removes friction, and friction is often what stops someone from spending tokens.
Poor audio tends to degrade viewer patience fairly quickly. Audio quality generally has a bigger impact on how professional a stream feels than video resolution alone. A stable, clear picture also helps, both factors feed into how long people stay and whether they tip.
Viewers aren't paying for pixel-perfect resolution. They're paying for a sense of connection. If they can't see your reactions or hear you properly, that connection breaks, and so do the tips.
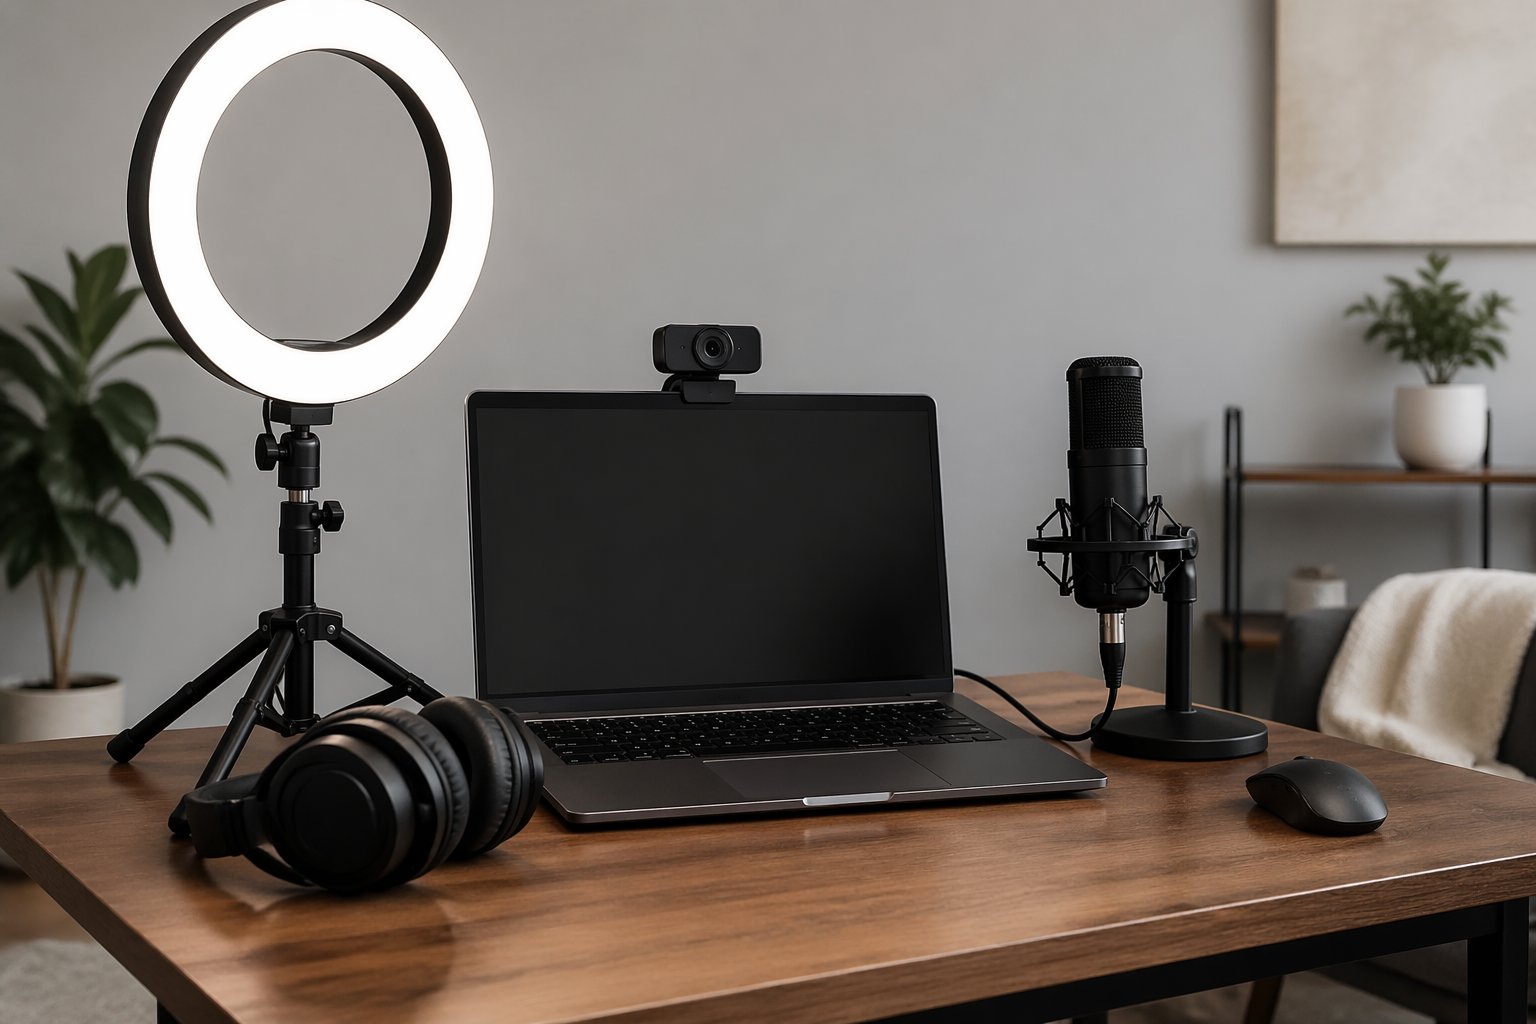
Chatterbate Streaming Equipment List: Budget and Mid-Range Options
Below is a practical Chatterbate streaming equipment list covering the four areas that matter most. Each includes a budget option for those just starting out and a mid-range option for when you're ready to make a meaningful quality improvement.
Webcams: Choosing a Camera for Chaturbate
- Budget: Logitech C920A reliable 1080p webcam that produces a clean, sharp image in most lighting conditions. It's widely considered the entry-level standard for Chaturbate streamers and handles everyday room lighting well, so you spend less time adjusting settings.
- Mid-Range: Logitech Brio 4K, Offers better low-light performance and HDR capability (HDR means the camera handles bright and dark areas of the frame at the same time, without washing out your image). Worth considering once you're earning consistently and want a noticeably more polished picture.
Microphones for Chaturbate
- Budget: Blue Snowball iCE, A USB condenser microphone that delivers noticeably cleaner audio than any built-in laptop mic. Plug-and-play, no audio interface needed. On Chaturbate, your voice matters a lot, and this microphone makes it sound present and clear rather than thin and distant. It's probably the easiest single upgrade on this list.
- Mid-Range: Blue Yeti Offers multiple polar patterns, meaning you can adjust the directions from which the microphone picks up sound. A tighter pattern reduces background noise, which is useful if your recording space isn't acoustically ideal.
Lighting: Setting Up Your Chaturbate Lighting
- Budget: Neewer 10-inch Ring Light, Affordable, even, front-facing illumination that eliminates harsh shadows and lifts your camera exposure straight away. It makes your expressions easier to read, which tends to help with viewer engagement.
- Mid-Range: Elgato Key Light, Dimmable, colour-temperature-adjustable, and works with streaming software. Produces a more natural-looking result than a ring light and is easier to position cleanly. A reasonable choice once your earnings justify the cost.
Capture Cards (for DSLR or Console Setups)
- Budget: AVerMedia Live Gamer Portable 2, Connects a DSLR or mirrorless camera to your computer via HDMI so it works as a webcam. A cost-effective way to get better camera footage into your streaming software without a large outlay.
- Mid-Range: Elgato Cam Link 4K, Compact and reliable, widely used by streamers stepping up their Chaturbate gear setup to camera-quality video. Works well with OBS and most major streaming platforms including Chaturbate. If you're already using OBS, our guide on setting up OBS for adult streaming covers how to get the most from this combination.
Your Step-by-Step Studio Build
You don't need to sort everything at once. Work through these steps in order. Each one makes a real difference before you move on to the next.
Step 1: Sort your lighting. Position your main light source so it illuminates your face evenly and removes harsh shadows. The goal is clarity, not drama. Even moving from overhead room lighting to a simple ring light tends to make expressions much easier to read on camera.
Step 2: Secure your connection. Use an Ethernet cable wherever possible. Wired connections reduce buffering and dropped frames, both of which send viewers elsewhere. On Chaturbate, interruptions during tipping moments can directly cost you tokens. A 5GHz Wi-Fi connection is a reasonable fallback only when running a cable genuinely isn't practical.
Step 3: Position your camera at eye level. Not tilted up from your desk. A natural, direct angle tends to build more rapport with viewers and makes them feel like you're talking to them rather than past them. It's a small adjustment that often makes a noticeable difference.
Step 4: Check for background noise. Record a 30-second clip and listen back carefully. Hums, echoes, and outside noise are easy to miss in the moment but immediately obvious to a viewer. A quiet background makes your voice feel closer and more engaging. It's worth fixing before your first stream.
How to Talk About Your Setup On-Stream
Your gear doesn't have to be a source of anxiety. It can actually be a useful conversation starter. These two examples give you ready-to-use language for common situations.
The Tech-Check script: "Hey everyone, quick tech-check. If anyone's experiencing lag or audio issues, let me know in chat so I can sort it. Your viewing experience matters to me." Simple, proactive, and shows you're paying attention.
The Upkeep script: "Things might look a bit sharper soon, your support is helping me save for a new lens, which should make our streams even better." This gives viewers a reason to feel invested in your progress. Transparent, incremental upgrades are often where consistent long-term support comes from.
Beginner Budget vs Advanced Investment: Scaling Sensibly
For beginners: Before spending anything, try using a window for natural light and a high-quality smartphone as a temporary webcam. Focus on consistency and engagement first. Many new streamers overspend early, then step back before seeing any real return. Keep your initial Chatterbate streaming equipment list short, three items at most.
For established streamers: A dedicated DSLR paired with a Cam Link adapter is often a better investment than a PC upgrade. The shallow depth of field it produces tends to look polished without feeling overdone. Scaling one targeted piece of equipment at a time tends to work better than upgrading everything at once.
Common Mistakes That Cost You Viewers and Tokens
Using a built-in laptop microphone. This is one of the most common errors on any Chatterbate streaming equipment list, and one of the easiest to fix. Built-in mics tend to introduce echo, distance, and a tinny quality that makes viewers work to hear you. On Chaturbate, where audio plays a big part in how connected viewers feel, this matters. A USB microphone in the £30 range makes an immediate, noticeable difference.
Here's a common visual mistake worth noting:
Over-lighting your face against a dark background. This creates a so-called 'floating head' effect, unnatural and slightly clinical-looking. Balanced lighting that gives your surroundings a bit of context almost always looks better. Good lighting looks confident; poor lighting tends to look careless.
Ignoring audio before your first stream. Many new streamers test their video carefully whilst paying little attention to audio. Viewers will generally tolerate average video for much longer than they'll put up with poor sound. Microphone placement and background noise reduction are worth sorting from day one.
Your Immediate Action Plan
There's no need to wait until everything feels perfect. Here's a straightforward four-step plan to get your Chaturbate streaming equipment list in order. Each step takes less than an hour and will make a real difference to your stream quality.
Working through this Chatterbate streaming equipment list in a sensible order means you're putting your money where it'll actually make a difference. Start with the basics, fix what's broken, and build from there.
Frequently Asked Questions
What should be on my Chatterbate streaming equipment list as a beginner?
Your beginner list needs just three things: a 1080p webcam (the Logitech C920 is the standard recommendation), a dedicated ring light, and a wired internet connection with at least 10Mbps upload speed. Get these right before adding anything else.
Why does stream quality affect tips on Chaturbate?
When viewers can clearly see your expressions and hear your voice, it's easier for them to feel engaged. Poor quality, particularly poor audio, creates friction that tends to put people off spending tokens. Clarity and stability generally support longer watch times and better tipping behaviour.
What is the best camera for Chaturbate beginners?
The Logitech C920 is the most commonly recommended entry-level option. It's a reliable 1080p webcam that produces a clean, sharp image and is widely considered the starting point for Chaturbate streamers. The Logitech Brio 4K is worth considering once you're earning consistently and want better low-light performance.
How can I improve my audio quality for streaming?
Switch to a dedicated USB microphone. The Blue Snowball iCE or Blue Yeti are both solid, affordable options that deliver noticeably cleaner audio than any built-in laptop mic. Pair that with a quiet background and sensible mic placement, and the difference is usually immediate. On Chaturbate, clear audio tends to be directly linked to better viewer engagement.
What upload speed do I need for Chaturbate streaming?
At least 10Mbps on a wired connection. This helps prevent lag and dropped frames, both of which tend to cause viewers to leave, sometimes right in the middle of a tipping moment.
Should I upgrade my PC before investing in a better camera?
For most established streamers, a dedicated DSLR with a Cam Link adapter is likely a better investment than a PC upgrade. The shallow depth of field it produces tends to look polished without being overdone, and it's a more targeted improvement to your overall Chaturbate gear setup.
Ready to Experience Live Cams?
Put these tips into practice and enjoy premium live entertainment.
Watch Live Cams Free